


WPFアプリのマイグレーションとモダナイゼーション
サンプルアプリ
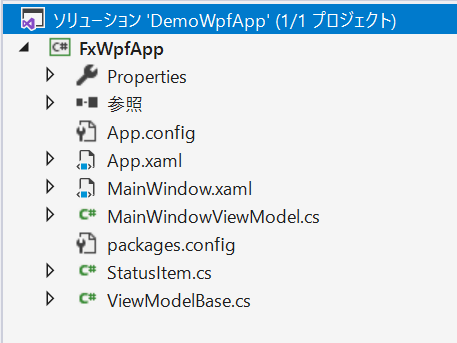
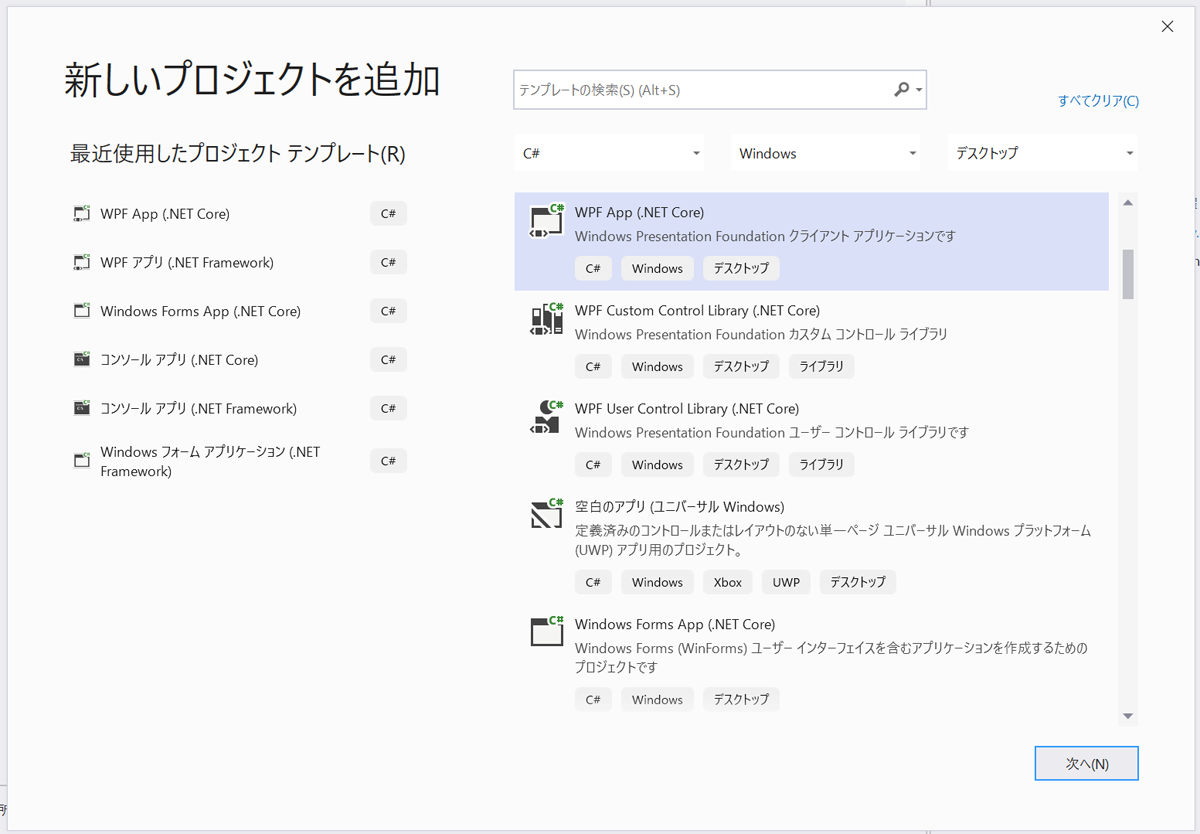
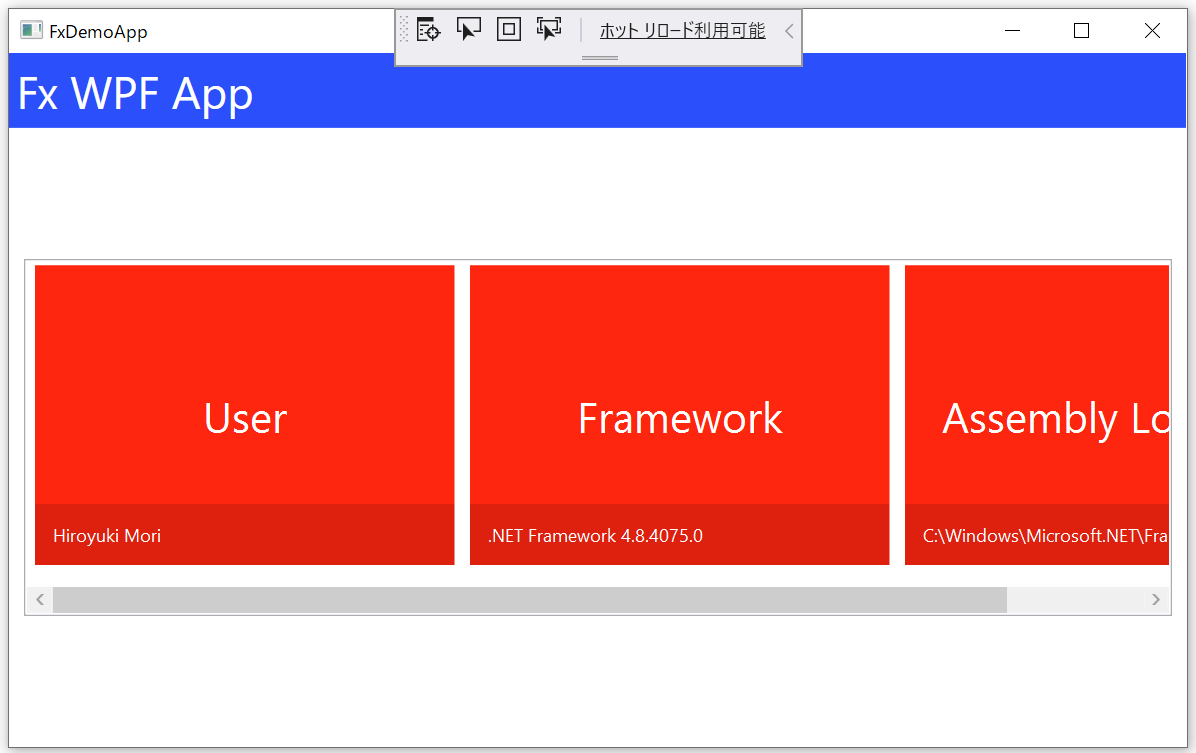
WPFアプリのケースでサンプルとして使用するのは以下のアプリです。
実行すると以下の通り表示されます。
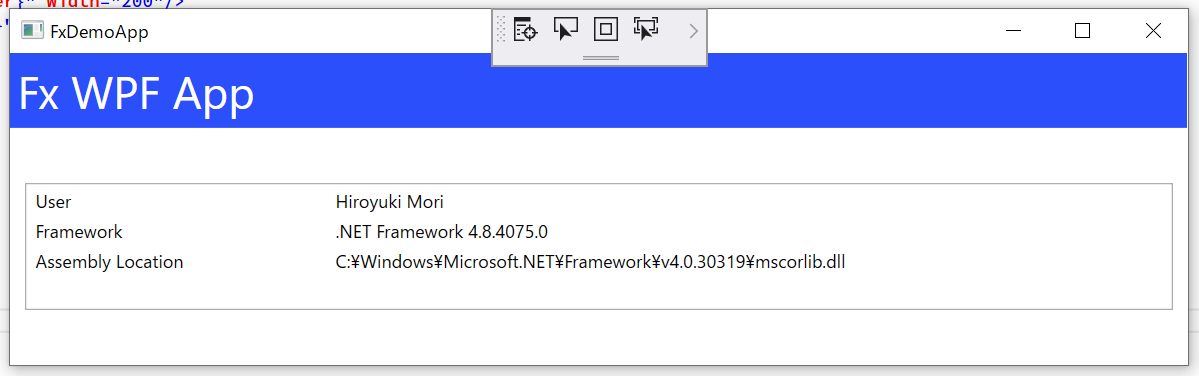
UIとしてはListBoxにItemTemplateを適用し、表示をカスタマイズしています。
ソースコードについて
ViewModelBase.cs
ViewModelの基底クラスとしてViewModelBase.csという抽象クラスを定義しています。
using System.ComponentModel;
using System.Runtime.CompilerServices;

namespace FxWpfApp
{
    public abstract class ViewModelBase : INotifyPropertyChanged
    {
        public event PropertyChangedEventHandler PropertyChanged;
        public void NotifyPropertyChanged([CallerMemberName] string propertyName = "")
            => PropertyChanged?.Invoke(this, new PropertyChangedEventArgs(propertyName));
    }
}
StatusItem.cs
項目格納用クラスとしてStatusItem.csを追加しています。
namespace FxWpfApp
{
    public class StatusItem : ViewModelBase
    {
        private string header;

        public string Header
        {
            get => header;
            set
            {
                header = value;
                NotifyPropertyChanged();
            }
        }

        private string body;

        public string Body
        {
            get => body;
            set
            {
                body = value;
                NotifyPropertyChanged();
            }
        }

        public StatusItem()
        {
        }

        public StatusItem(string header, string body)
        {
            Header = header;
            Body   = body;
        }
    }
}
MainWindowViewModel.cs
そして、MainWindowのViewModelクラスを定義しました。
using System;
using System.Collections.ObjectModel;
using System.Runtime.InteropServices;

namespace FxWpfApp
{
    public class MainWindowViewModel : ViewModelBase
    {
        public ObservableCollection<StatusItem> StatusItems { get; set; } = new ObservableCollection<StatusItem>();

        public MainWindowViewModel()
        {
            StatusItems.Clear();
            StatusItems.Add(new StatusItem("User", Environment.UserName));
            StatusItems.Add(new StatusItem("Framework", RuntimeInformation.FrameworkDescription));
            StatusItems.Add(new StatusItem("Assembly Location", typeof(string).Assembly.Location));
        }
    }
}
MainWindow.cs
メインとなるXAMLには、ListBoxを使用します。ItemTemplateにStatusItem.csが表示できるようDataTemplateをカスタマイズしています。
<Window x:Class="FxWpfApp.MainWindow"
        xmlns="http://schemas.microsoft.com/winfx/2006/xaml/presentation"
        xmlns:x="http://schemas.microsoft.com/winfx/2006/xaml"
        xmlns:d="http://schemas.microsoft.com/expression/blend/2008"
        xmlns:mc="http://schemas.openxmlformats.org/markup-compatibility/2006"
        xmlns:local="clr-namespace:FxWpfApp"
        mc:Ignorable="d"
        Title="FxDemoApp" Height="245.492" Width="800">
    <Window.Resources>
        <DataTemplate x:Key="DataTemplate1">
            <StackPanel Orientation="Horizontal">
                <TextBlock Text="{Binding Header}" Width="200"/>
                <TextBlock Text="{Binding Body}" Width="400"/>
            </StackPanel>
        </DataTemplate>
    </Window.Resources>
    <Window.DataContext>
        <local:MainWindowViewModel/>
    </Window.DataContext>
    <Grid>
        <Grid.ColumnDefinitions>
            <ColumnDefinition Width="5"/>
            <ColumnDefinition Width="649*"/>
            <ColumnDefinition Width="5"/>
        </Grid.ColumnDefinitions>
        <Grid.RowDefinitions>
            <RowDefinition Height="Auto"/>
            <RowDefinition Height="*"/>
            <RowDefinition Height="3*"/>
            <RowDefinition Height="*"/>
        </Grid.RowDefinitions>
        <Rectangle Fill="#FF2B4FFB" Grid.ColumnSpan="3" Margin="0,0,0.667,0" />
        <TextBlock Text="Fx WPF App" Foreground="White" FontSize="30" Margin="5" Grid.ColumnSpan="3"/>

        <!-- データの表示はListBoxのみ -->
        <ListBox Grid.Row="2" Grid.Column="1" Margin="5" ItemsSource="{Binding StatusItems}" ItemTemplate="{DynamicResource DataTemplate1}"  />
    </Grid>
</Window>
WPFアプリのマイグレーション手順
マイグレーションの基本的な流れはWinFormsアプリとほぼ同様です。
今回はモダナイゼーションのアプローチにComponentOneのTiles for WPFを使用しています。
全体の手順は以下の通りです。
- ItemsTemplateに指定しているDataTemplateをTiles for WPFを使用したものに更新する。
- .NET Portability Analyzerや.NET API アナライザーなどを使用して互換性の問題がないか確認する。
- Windows互換機能パックの利用を検討する。
- NuGetパッケージの更新を行う。
- プロジェクトの移行を行う。
2や3の方法はすでに説明した内容と同じなので、ここでは1、5、6の手順について解説します。
ItemsTemplateに指定しているDataTemplateをTiles for WPFを使用したものに更新
現在のXAMLから以下の手順で更新します。
- DataTemplateに指定されていた内容をComponentOneのC1Tileに入れ替える。
- C1Tileに対するStyleを定義する。
- ItemsPanelにC1WrapPanelを指定する。
- MainWindowのHeightを調整する。
DataTemplateに指定されていた内容をComponentOneのC1Tileに入れ替える
ツールボックスからC1TileをXAMLのWindows.Resources要素内に定義されているDataTemplateにドラッグして、属性を以下の通り書き換えます。
<DataTemplate x:Key="DataTemplate1">
    <c1:C1Tile
        Padding="0"
        Content="{Binding Header}"
        Header="{Binding Body}"
        HeaderBackground="#22000000"
        HeaderPadding="12"
        HorizontalHeaderAlignment="Stretch" Background="#FFFF2610" />
</DataTemplate>
ツールボックスからではなく、XAMLを直接記述する場合、ルート要素であるWindow要素に以下のXML名前空間を追加します。
xmlns:c1="http://schemas.componentone.com/winfx/2006/xaml"
C1Tileに対するStyleを定義する
同じくWindows.Resourcesに対してC1Tileで利用する既定のスタイルを以下の通り追加します。
<Style TargetType="c1:C1Tile">
    <Setter Property="Background" Value="#FFC410" />
    <Setter Property="Foreground" Value="White" />
    <Setter Property="FontSize" Value="28" />
    <Setter Property="TextOptions.TextFormattingMode" Value="Display" />
    <Setter Property="HeaderForeground" Value="White" />
    <Setter Property="HeaderFontSize" Value="12" />
    <Setter Property="BorderThickness" Value="0" />
    <Setter Property="Width" Value="280" />
    <Setter Property="Height" Value="200" />
</Style>
ItemsPanelにC1WrapPanelを指定する
ListBoxの記述にItemsPanelの定義を追加します。
<ListBox
    Grid.Row="2"
    Grid.Column="1"
    Margin="5"
    ItemTemplate="{DynamicResource DataTemplate1}"
    ItemsSource="{Binding StatusItems}">
    <ListBox.ItemsPanel>
        <ItemsPanelTemplate>
            <c1:C1WrapPanel />
        </ItemsPanelTemplate>
    </ListBox.ItemsPanel>
</ListBox>
MainWindowのHeightを調整する
要素の高さが不足するので、MainWindowのHeightプロパティを500に変更します。ここまでの手順を正しく行えると以下のXAMLになります。
<Window
    x:Class="FxWpfApp.MainWindow"
    xmlns="http://schemas.microsoft.com/winfx/2006/xaml/presentation"
    xmlns:x="http://schemas.microsoft.com/winfx/2006/xaml"
    xmlns:c1="http://schemas.componentone.com/winfx/2006/xaml"
    xmlns:d="http://schemas.microsoft.com/expression/blend/2008"
    xmlns:local="clr-namespace:FxWpfApp"
    xmlns:mc="http://schemas.openxmlformats.org/markup-compatibility/2006"
    Title="FxDemoApp"
    Width="800"
    Height="500"
    mc:Ignorable="d">
    <Window.Resources>
        <Style TargetType="c1:C1Tile">
            <Setter Property="Background" Value="#FFC410" />
            <Setter Property="Foreground" Value="White" />
            <Setter Property="FontSize" Value="28" />
            <Setter Property="TextOptions.TextFormattingMode" Value="Display" />
            <Setter Property="HeaderForeground" Value="White" />
            <Setter Property="HeaderFontSize" Value="12" />
            <Setter Property="BorderThickness" Value="0" />
            <Setter Property="Width" Value="280" />
            <Setter Property="Height" Value="200" />
        </Style>
        <DataTemplate x:Key="DataTemplate1">
            <c1:C1Tile
                Padding="0"
                Background="#FFFF2610"
                Content="{Binding Header}"
                Header="{Binding Body}"
                HeaderBackground="#22000000"
                HeaderPadding="12"
                HorizontalHeaderAlignment="Stretch" />
        </DataTemplate>
    </Window.Resources>
    <Window.DataContext>
        <local:MainWindowViewModel />
    </Window.DataContext>
    <Grid>
        <Grid.ColumnDefinitions>
            <ColumnDefinition Width="5" />
            <ColumnDefinition Width="649*" />
            <ColumnDefinition Width="5" />
        </Grid.ColumnDefinitions>
        <Grid.RowDefinitions>
            <RowDefinition Height="Auto" />
            <RowDefinition Height="*" />
            <RowDefinition Height="3*" />
            <RowDefinition Height="*" />
        </Grid.RowDefinitions>
        <Rectangle
            Grid.ColumnSpan="3"
            Margin="0,0,0.667,0"
            Fill="#FF2B4FFB" />
        <TextBlock
            Grid.ColumnSpan="3"
            Margin="5"
            FontSize="30"
            Foreground="White"
            Text="Fx WPF App" />

        <!--  データの表示はListBoxのみ  -->
        <ListBox
            Grid.Row="2"
            Grid.Column="1"
            Margin="5"
            ItemTemplate="{DynamicResource DataTemplate1}"
            ItemsSource="{Binding StatusItems}">
            <ListBox.ItemsPanel>
                <ItemsPanelTemplate>
                    <c1:C1WrapPanel />
                </ItemsPanelTemplate>
            </ListBox.ItemsPanel>
        </ListBox>
    </Grid>
</Window>
修正が終わったら、保存してビルドし、実行できるか確認します。
プロジェクトの移行
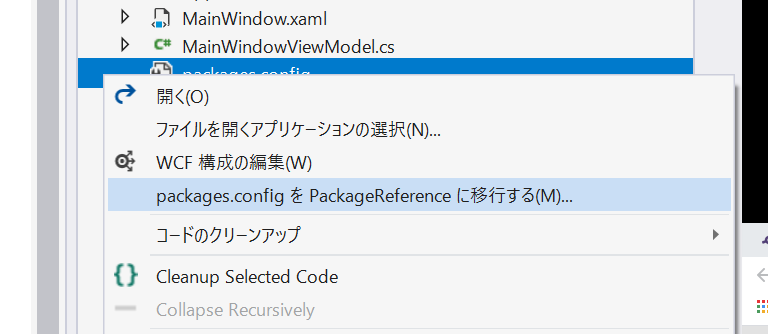
NuGetなどから追加で使用したPackageが存在する場合、ソリューションエクスプローラーからpackage.configの移行を行います。
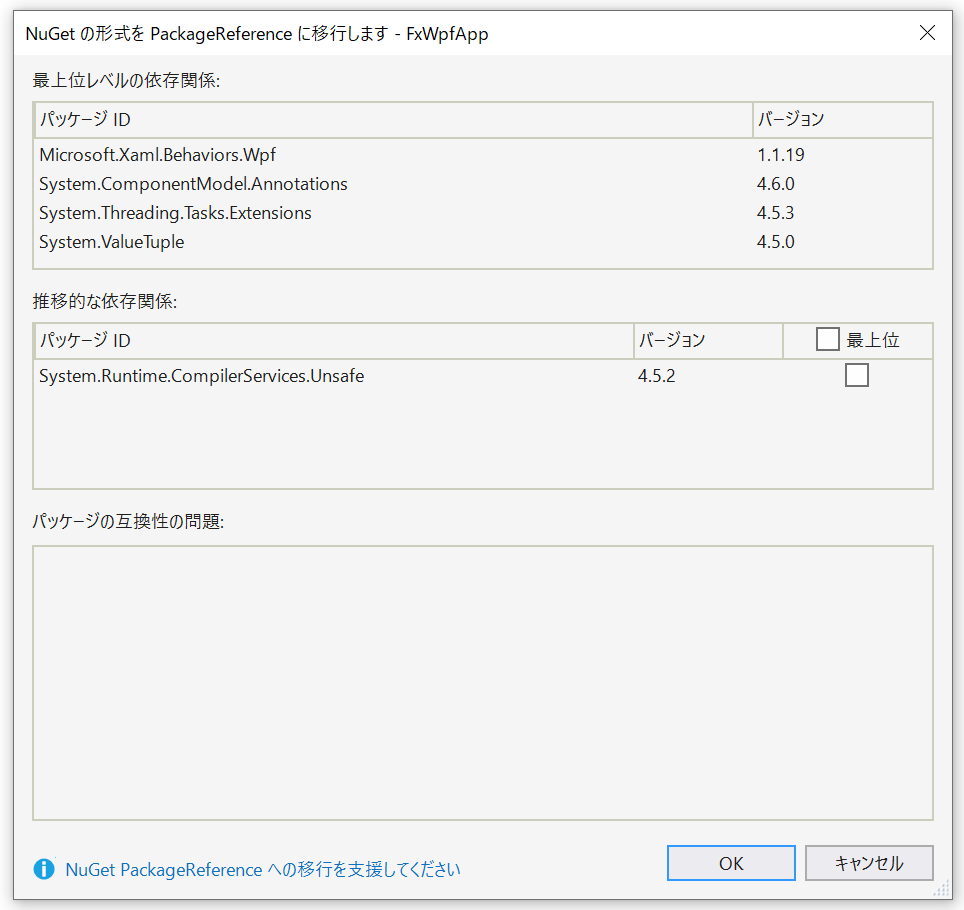
[NuGetの形式をPackageReferenceに移行します]ウインドウが表示されたら[OK]ボタンをクリックして移行します。
互換ライブラリの調査など、移行のための手順が終了したら、WPF App(.NET Core)プロジェクトをソリューションに追加します。今回はCoreWpfAppの名前でプロジェクトを作成します。
.NET FrameworkプロジェクトのファイルをWPF App(.NET Core)プロジェクトにコピーします。
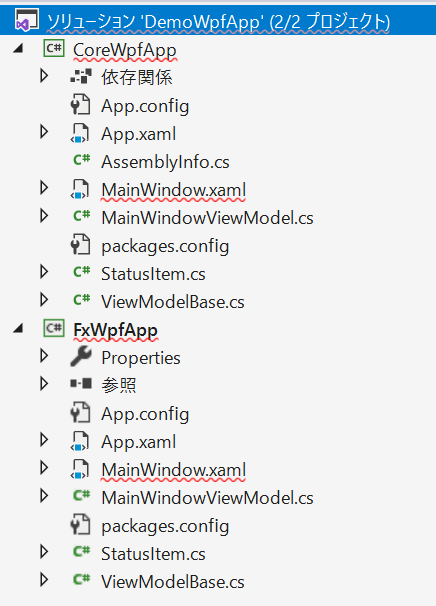
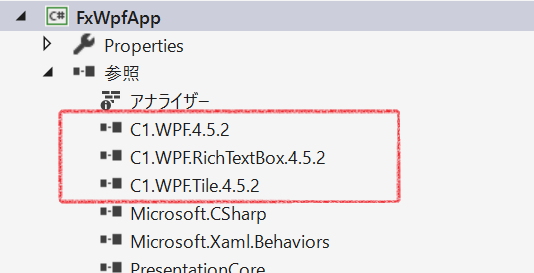
ソリューションエクスプローラーからFxWpfAppプロジェクトの参照を確認し、.NET Framework互換モードで動作するライブラリを確認後、CoreWpfAppの参照に追加します。
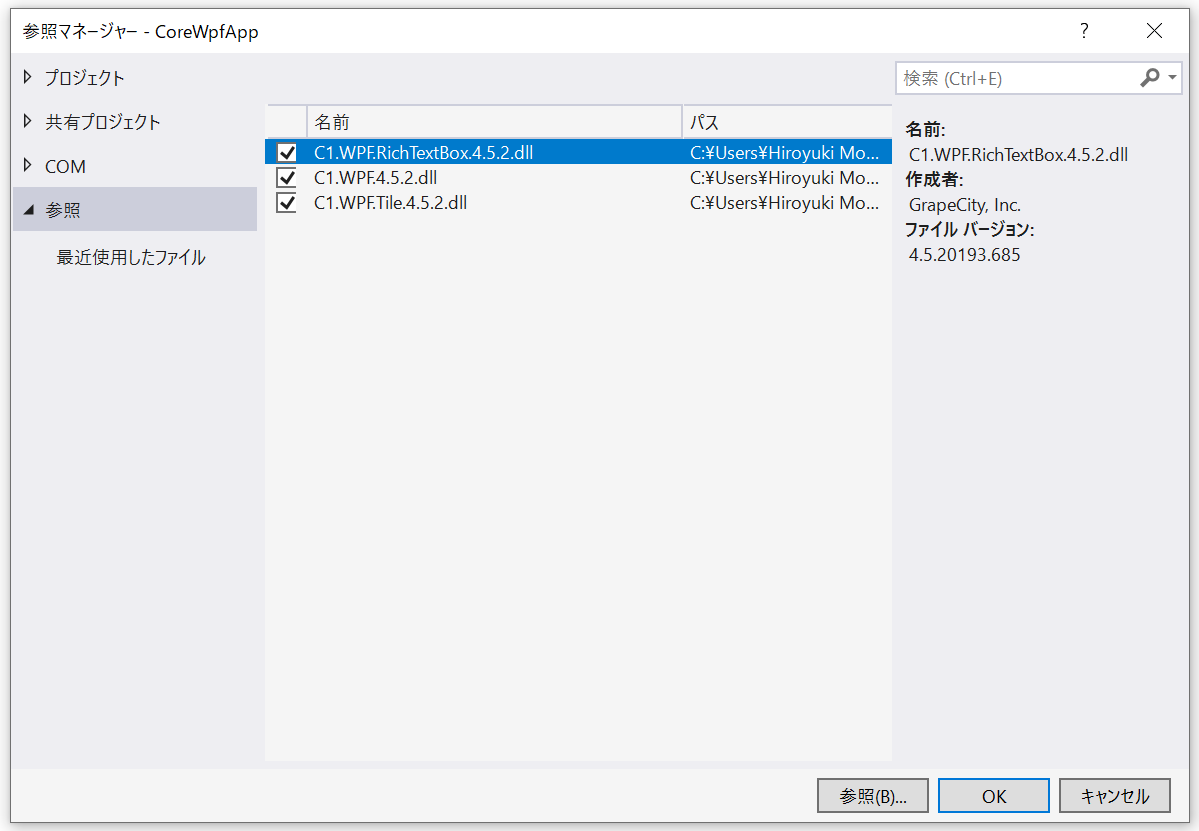
ComponentOneのコントロールは、いずれも.NET Framework互換モードで動作するため、ここでは以下の3つのライブラリをCoreWpfAppから参照します。
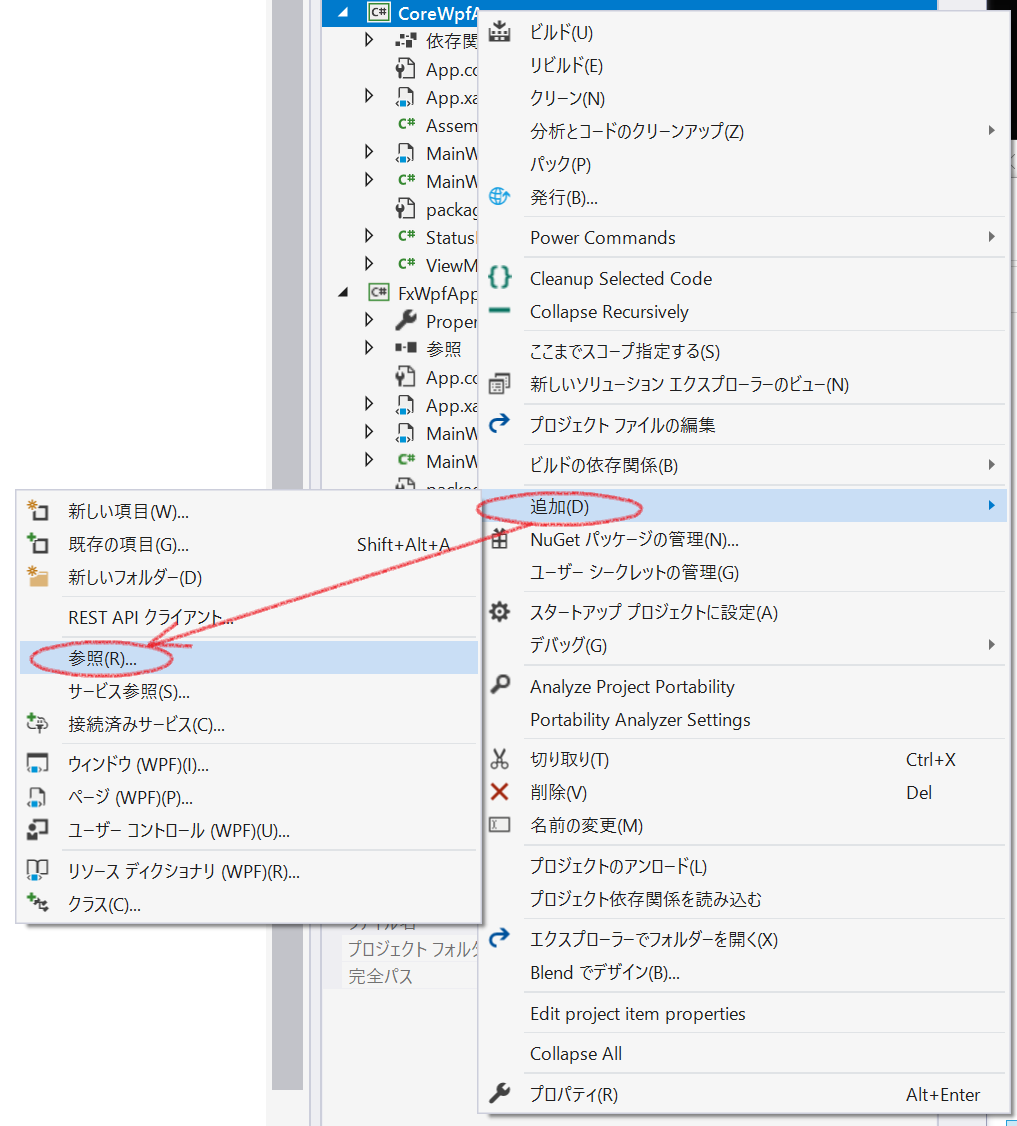
.NET Coreプロジェクトへ参照の追加する方法は、ソリューションエクスプローラーからCoreWpfAppプロジェクトを右クリックしてコンテキストメニューを表示します。
表示されたメニューから[追加]→[参照]の順に指定します。
参照マネージャーが表示されるので、使用するライブラリの追加を行います。
ライブラリは、元プロジェクト(今回の場合はFxWpfApp)のbinフォルダーなどから参照できるので、参照マネージャーの[参照]ボタンをクリックし、使用するライブラリファイルを追加します。追加するファイルの指定は複数同時に行うことも可能です。
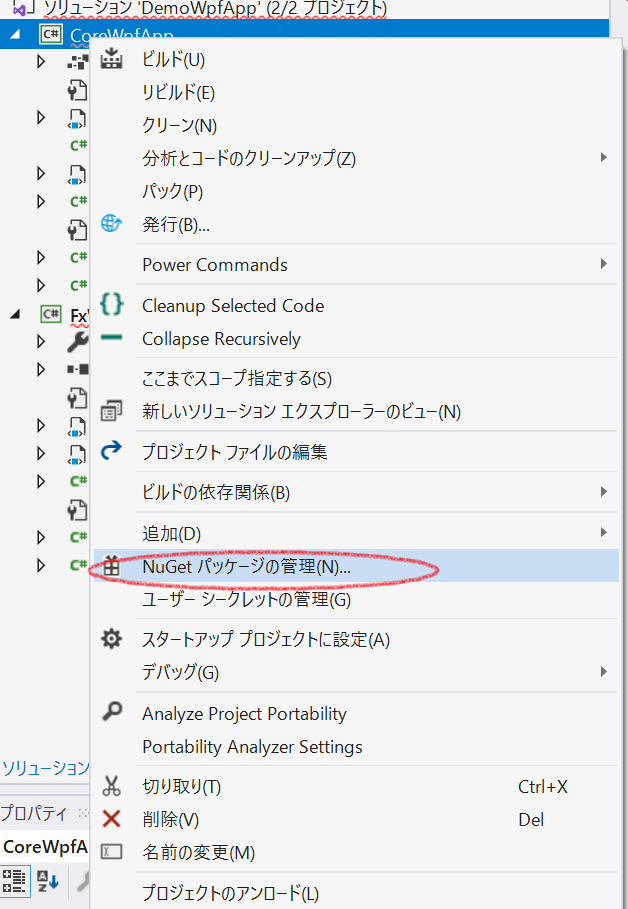
続けて、NuGetから参照するライブラリがある場合は、ソリューションエクスプローラーから.NET Coreアプリのプロジェクトを右クリックし、NuGet Packageの追加を行います。
正しく移行ができると、以下の通りに起動します。
まとめ
.NET Coreに対するマイグレーションは、ツールやライブラリのサポートなども充実していることもあり、単純なものであれば比較的スムーズに行うことができます。
しかし、古いライブラリを利用していたり現在非推奨のAPIを利用していたりするケースでは、別の方法に切り替える必要があります。
スムーズに移行が行えた場合も、テストをしっかり行って動作の確認を行う必要があります。そのため、移行にはそれなりの工数を見込む必要があるでしょう。
しかし、移行するだけで得られることができるパフォーマンスの向上や今後登場する新しい機能を利用できるなどのメリットも多くあり、極力早めに対応したいところです。


