コンポーネントサンプル
それでは、TextBoxとListBoxを、InputManとFlexGridに置き換えたサンプルを作ってみましょう。

InputManのGcTextBoxとFlexGridのC1FlexGridを利用するにはツールボックスでアイテムの追加を行います。
ツールボックスの[GcTextBox]と[C1FlexGrid]をMainWindows.xamlのデザイン画面にドラッグ&ドロップして配置します。一度配置してしまえば、後はXAMLコードを編集して微調整もできます。
画面デザインの記述
WPF標準コントロールを置き換えた後のXAML定義を見てみましょう。
<Window x:Class="MainWindow"
    xmlns="http://schemas.microsoft.com/winfx/2006/xaml/presentation"
    xmlns:x="http://schemas.microsoft.com/winfx/2006/xaml"
    xmlns:c="clr-namespace:GCTwitterSearch.Converters"
    Title="Twitter Search with GrapeCity Component" Height="600" Width="515" xmlns:im="http://schemas.grapecity.com/windows/2010/inputman" xmlns:c1="http://schemas.componentone.com/winfx/2006/xaml" DataContext="{Binding}" ContentTemplate="{Binding}">

    <Window.Resources>
        <c:DateConverter x:Key="DateConverter" />
    </Window.Resources>

    <Grid>
        <Grid.RowDefinitions>
            <RowDefinition Height="Auto" />
            <RowDefinition Height="*" />
        </Grid.RowDefinitions>
        <StackPanel x:Name="ContentPanel" Grid.Row="0" Orientation="Horizontal">
            <im:GcTextBox x:Name="Keyword_TextBox" Width="370" Margin="10,0,10,0" WatermarkDisplayNull="検索キーワードを入力して下さい" WatermarkNull="検索キーワードを入力して下さい" WatermarkDisplayNullForeground="#7FFF0000" WatermarkNullForeground="#7F000000" />
            <Button Content="検索" Click="Search_Click" Width="90" />
        </StackPanel>
        <c1:C1FlexGrid x:Name="Result_ListBox" Grid.Row="1" IsReadOnly="True" AutoGenerateColumns="False">
            <c1:C1FlexGrid.Columns>
                <c1:Column Width="64">
                    <c1:Column.CellTemplate>
                        <DataTemplate>
                            <Image Source="{Binding profile_image_url}" HorizontalAlignment="Left"
                                   Height="64" Width="64"
                                   VerticalAlignment="Top" />
                        </DataTemplate>
                    </c1:Column.CellTemplate>
                </c1:Column>
                <c1:Column Binding="{Binding created_at, Converter={StaticResource DateConverter}}" Header="Time"  Width="Auto"/>
                <c1:Column Binding="{Binding from_user}" Header="From" Foreground="Blue" />
                <c1:Column Binding="{Binding text}" Header="Text" Width="386" TextWrapping="True" />
            </c1:C1FlexGrid.Columns>
        </c1:C1FlexGrid>
    </Grid>
</Window>
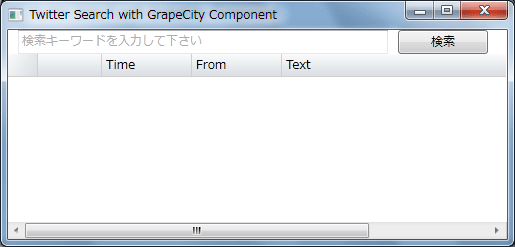
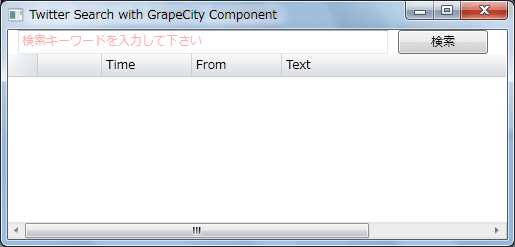
GcTextBoxでは「WatermarkDisplayNull」プロパティで値が未入力の時に表示する文字列、「WatermarkNull」プロパティで値が未入力で入力フォーカスがある時に表示する文字列を指定できます。さらに「WatermarkDisplayNullForeground」プロパティと「WatermarkNullForeground」プロパティを使ってそれぞれの状態のウォータマークの文字色も指定できるので、より的確なイメージを利用者に提供できます。


また、C1FlexGridではテンプレートを使わずプロパティとしてデザインを記述しています。そのためデザイン画面でもXAMLで定義したデザインが確認可能です。
Converterも「Binding="{Binding created_at, Converter={StaticResource DateConverter}}"」のようにバインディングの中に記述すれば問題なく利用できます。
ロジックの記述
このサンプルのコードは、WPF標準コントロールを使った時とほぼ同一です。相違点は行の高さを自動設定するメソッドの呼び出しを追加している点です。
(中略)
    Me.Result_ListBox.ItemsSource = jsonDataValue.results
    Me.Result_ListBox.UpdateLayout()
    Me.Result_ListBox.AutoSizeRows(0, Me.Result_ListBox.Rows.Count - 1, 0)
End Using
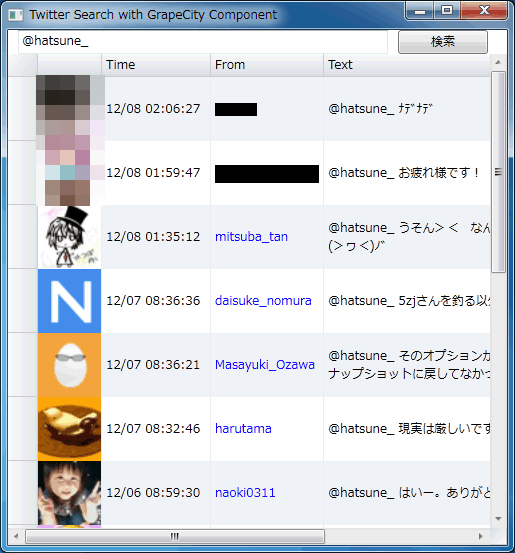
また、ロジックは全く追加していませんが、タイトルをクリックすることによりソート機能も実装しています。この機能はFlexGridによる機能拡張部分となります。このような拡張機能により、下図のように行の背景色(水色/白)を1行ごとに変更することなどもでき、より見やすく表示することが可能です。


