カスタムドロップダウンコントロールの作成(2)
2つ目のカスタムドロップダウンコントロールの作成
今作成したドロップダウンコントロールと同じ手順で、2つ目のカスタムドロップダウンコントロールを作成します。
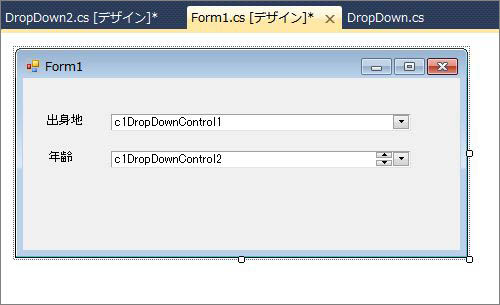
(1)フォームForm1にもう一つC1DropDownControlコントロールを追加します。ついでにラベルで表題も付けておきます。
(2)プロジェクトにWindowsフォームを追加します。フォーム名は「DropDown2」とします。そして、継承元をC1.Win.C1Input.DropDownFormに変更します。
Partial Class DropDown2
    Inherits C1.Win.C1Input.DropDownForm
namespace CustDropDown_Winform_cs
{
    public partial class DropDown2 : C1.Win.C1Input.DropDownForm
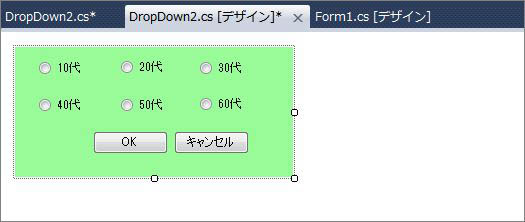
(3)ドロップダウンフォームにRadioButtonコントロールとButtonコントロールを配置します。RadioButtonコントロールには年齢を、ButtonコントロールはOK/キャンセルを設定し、DialogResultプロパティも設定します。
(4)Optionsプロパティをクリックして展開し、AutoResizeプロパティをTrueにします。
(5)PostChangesイベントハンドラを作成し、先に作成したDropDownフォームと同じコードを作成します。
Private Sub DropDown2_PostChanges(sender As System.Object, e As System.EventArgs) Handles MyBase.PostChanges
    If (MyBase.DialogResult = DialogResult.OK) Then
        Dim control1 As Control
        For Each control1 In MyBase.Controls
            If (TypeOf control1 Is RadioButton AndAlso CType(control1, RadioButton).Checked) Then
                MyBase.OwnerControl.Value = CType(control1, RadioButton).Text
            End If
        Next
    End If
End Sub
private void DropDown2_PostChanges(object sender, EventArgs e)
{
    if (DialogResult == DialogResult.OK)
    {
        foreach (Control control1 in Controls)
        {
            if (control1 as RadioButton != null && ((RadioButton)control1).Checked)
            {
                OwnerControl.Value = ((RadioButton)control1).Text;
            }
        }
    }
}
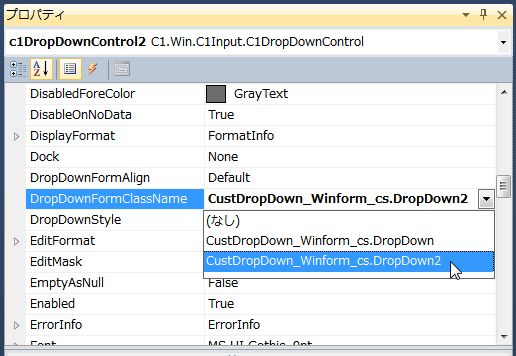
(6)フォームデザイナ「Form1」に移動し、2番目のC1DropDownControlコントロールのDropDownFormClassNameプロパティに、ドロップダウンフォーム「DropDown2」のクラス名を設定します。
(7)最後にVisibleButtonsプロパティを展開し、「UpDown」プロパティをFalseにします。
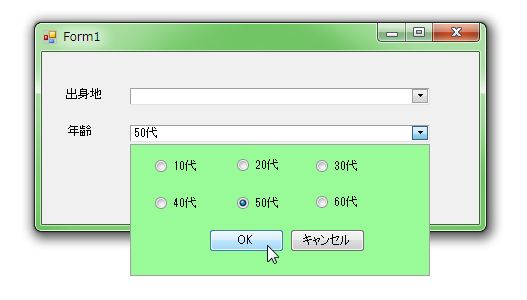
これで出来上がりです。アプリケーションを実行し、ドロップダウンフォームの動作を確認します。
まとめ
カスタムドロップダウンコントロールは、思ったよりも簡単に作成することができます。ドロップダウンフォームで選択された情報も簡単に取り出すことができるので、多くのデータを入力させるアプリケーションでは活躍するのではないでしょうか。


